![- Wax Seal Stamp - [Royal Wax Seals]](http://img.staticdj.com/5f77bf6ad5deadc08da43c7ebb6e473f_600x.png)
![Wax Seal Stamp Set, Retro Wax Stamp Seals kit, Copper Seals+ Wooden Handle (Life Series) - Wax Seal Stamp - [Royal Wax Seals]](http://img.staticdj.com/48403bc806a302a830f7329f806f74ef_1080x.jpg)
![Wax Seal Stamp Set, Retro Wax Stamp Seals kit, Copper Seals+ Wooden Handle (Life Series) - Wax Seal Stamp - [Royal Wax Seals]](http://img.staticdj.com/cec87b8df5634d9d147116154c69f872_1080x.jpg)
![Wax Seal Stamp Set, Retro Wax Stamp Seals kit, Copper Seals+ Wooden Handle (Life Series) - Wax Seal Stamp - [Royal Wax Seals]](http://img.staticdj.com/75ba83f9f77552d90dcb6fcfe91a54b5_1080x.jpg)
![Wax Seal Stamp Set, Retro Wax Stamp Seals kit, Copper Seals+ Wooden Handle (Life Series) - Wax Seal Stamp - [Royal Wax Seals]](http://img.staticdj.com/67fff0d4e0f8e3563f90032bbb56ad7b_1080x.jpg)
![Wax Seal Stamp Set, Retro Wax Stamp Seals kit, Copper Seals+ Wooden Handle (Life Series) - Wax Seal Stamp - [Royal Wax Seals]](http://img.staticdj.com/32df632c7788073df209f43b699daa97_1080x.jpg)
![Wax Seal Stamp Set, Retro Wax Stamp Seals kit, Copper Seals+ Wooden Handle (Life Series) - Wax Seal Stamp - [Royal Wax Seals]](http://img.staticdj.com/d11c4bf3c91e2f058c40c0b4d8aa32cf_1080x.jpg)
![Wax Seal Stamp Set, Retro Wax Stamp Seals kit, Copper Seals+ Wooden Handle (Life Series) - Wax Seal Stamp - [Royal Wax Seals]](http://img.staticdj.com/48403bc806a302a830f7329f806f74ef_100x.jpg)
![Wax Seal Stamp Set, Retro Wax Stamp Seals kit, Copper Seals+ Wooden Handle (Life Series) - Wax Seal Stamp - [Royal Wax Seals]](http://img.staticdj.com/cec87b8df5634d9d147116154c69f872_100x.jpg)
![Wax Seal Stamp Set, Retro Wax Stamp Seals kit, Copper Seals+ Wooden Handle (Life Series) - Wax Seal Stamp - [Royal Wax Seals]](http://img.staticdj.com/75ba83f9f77552d90dcb6fcfe91a54b5_100x.jpg)
![Wax Seal Stamp Set, Retro Wax Stamp Seals kit, Copper Seals+ Wooden Handle (Life Series) - Wax Seal Stamp - [Royal Wax Seals]](http://img.staticdj.com/67fff0d4e0f8e3563f90032bbb56ad7b_100x.jpg)
![Wax Seal Stamp Set, Retro Wax Stamp Seals kit, Copper Seals+ Wooden Handle (Life Series) - Wax Seal Stamp - [Royal Wax Seals]](http://img.staticdj.com/32df632c7788073df209f43b699daa97_100x.jpg)
![Wax Seal Stamp Set, Retro Wax Stamp Seals kit, Copper Seals+ Wooden Handle (Life Series) - Wax Seal Stamp - [Royal Wax Seals]](http://img.staticdj.com/d11c4bf3c91e2f058c40c0b4d8aa32cf_100x.jpg)
- In the past, there was no ink pad, therefore sealing wax was used. Burned on the envelope first, and then stamped with the ring seal. After drying, it becomes a thick and brittle piece. Whoever opens the letter would break the wax-sealed stamp. Sometimes a thin rope or beautiful ribbon is tied to the outside of the envelope. The joint and the seal are dripped with sealing wax and then stamped to make it more beautiful and secure.
- The seal can be applied on cards, scrapbooking, glass, plastic, wood and etc. Ideal for embellishment and decorating of the envelope, invitations, wine package, etc.
- You can stamp your Christmas cards, and it's romantic for Valentine's Day use for love letters! This elegant seal adds a touch of value and permanence to letters, envelopes, certificates, and documents, a bit old-fashioned but so charming and old-world.
- Gift Box Size: 4.9*1.57*4.3" (L*W*H). Wax Stamper Diameter: Approx. 0.95inch, Length: Approx. 3.5inch.
- Easy To Use: Cut some wax pieces from wax stickers, and melting them in the spoon with a tea candle; then pour the melting wax onto the needed place, and the last stamp onto the wax in several seconds
- REMOVABLE STAMP: Easy to Change and Install. It easily installs or exchanges to a different stamp! Material: Brass head and Rosewood Handle. Smooth and shiny, not easy to wear, you can use them for a very long time.
- Wax Seal Stamp Kit is great for decorating envelopes, parcels, Christmas cards, birthday cards, postcards, wedding or party invitations, hobby or craft projects, scrapbooks, galas, and other special events.
- Package : 7 x Seal Stamp, 1 x wooden handle, 1 x gift box
USE STEPS:
1.Cut a piece of sealing wax put it into the spoon and melt it.
2.Pour the melting wax on the paper or other things if you like.
3.Cool for 10 seconds, this step is very important.
4.Put the seal on the melting wax.
5.When the wax is dry, pick up the seal, and now it is finished!
Please kindly note that special offers do not support modifying product combinations.
We provide more advanced kits and peripheral products in the following list:
DIY Custom Logo Stamp Available Here: >>CUSTOM
More Advanced Accessories Here: >> ACCESSORIES
More Colors of Wax: >>WAX
More Advanced Handle: >> HANDLE
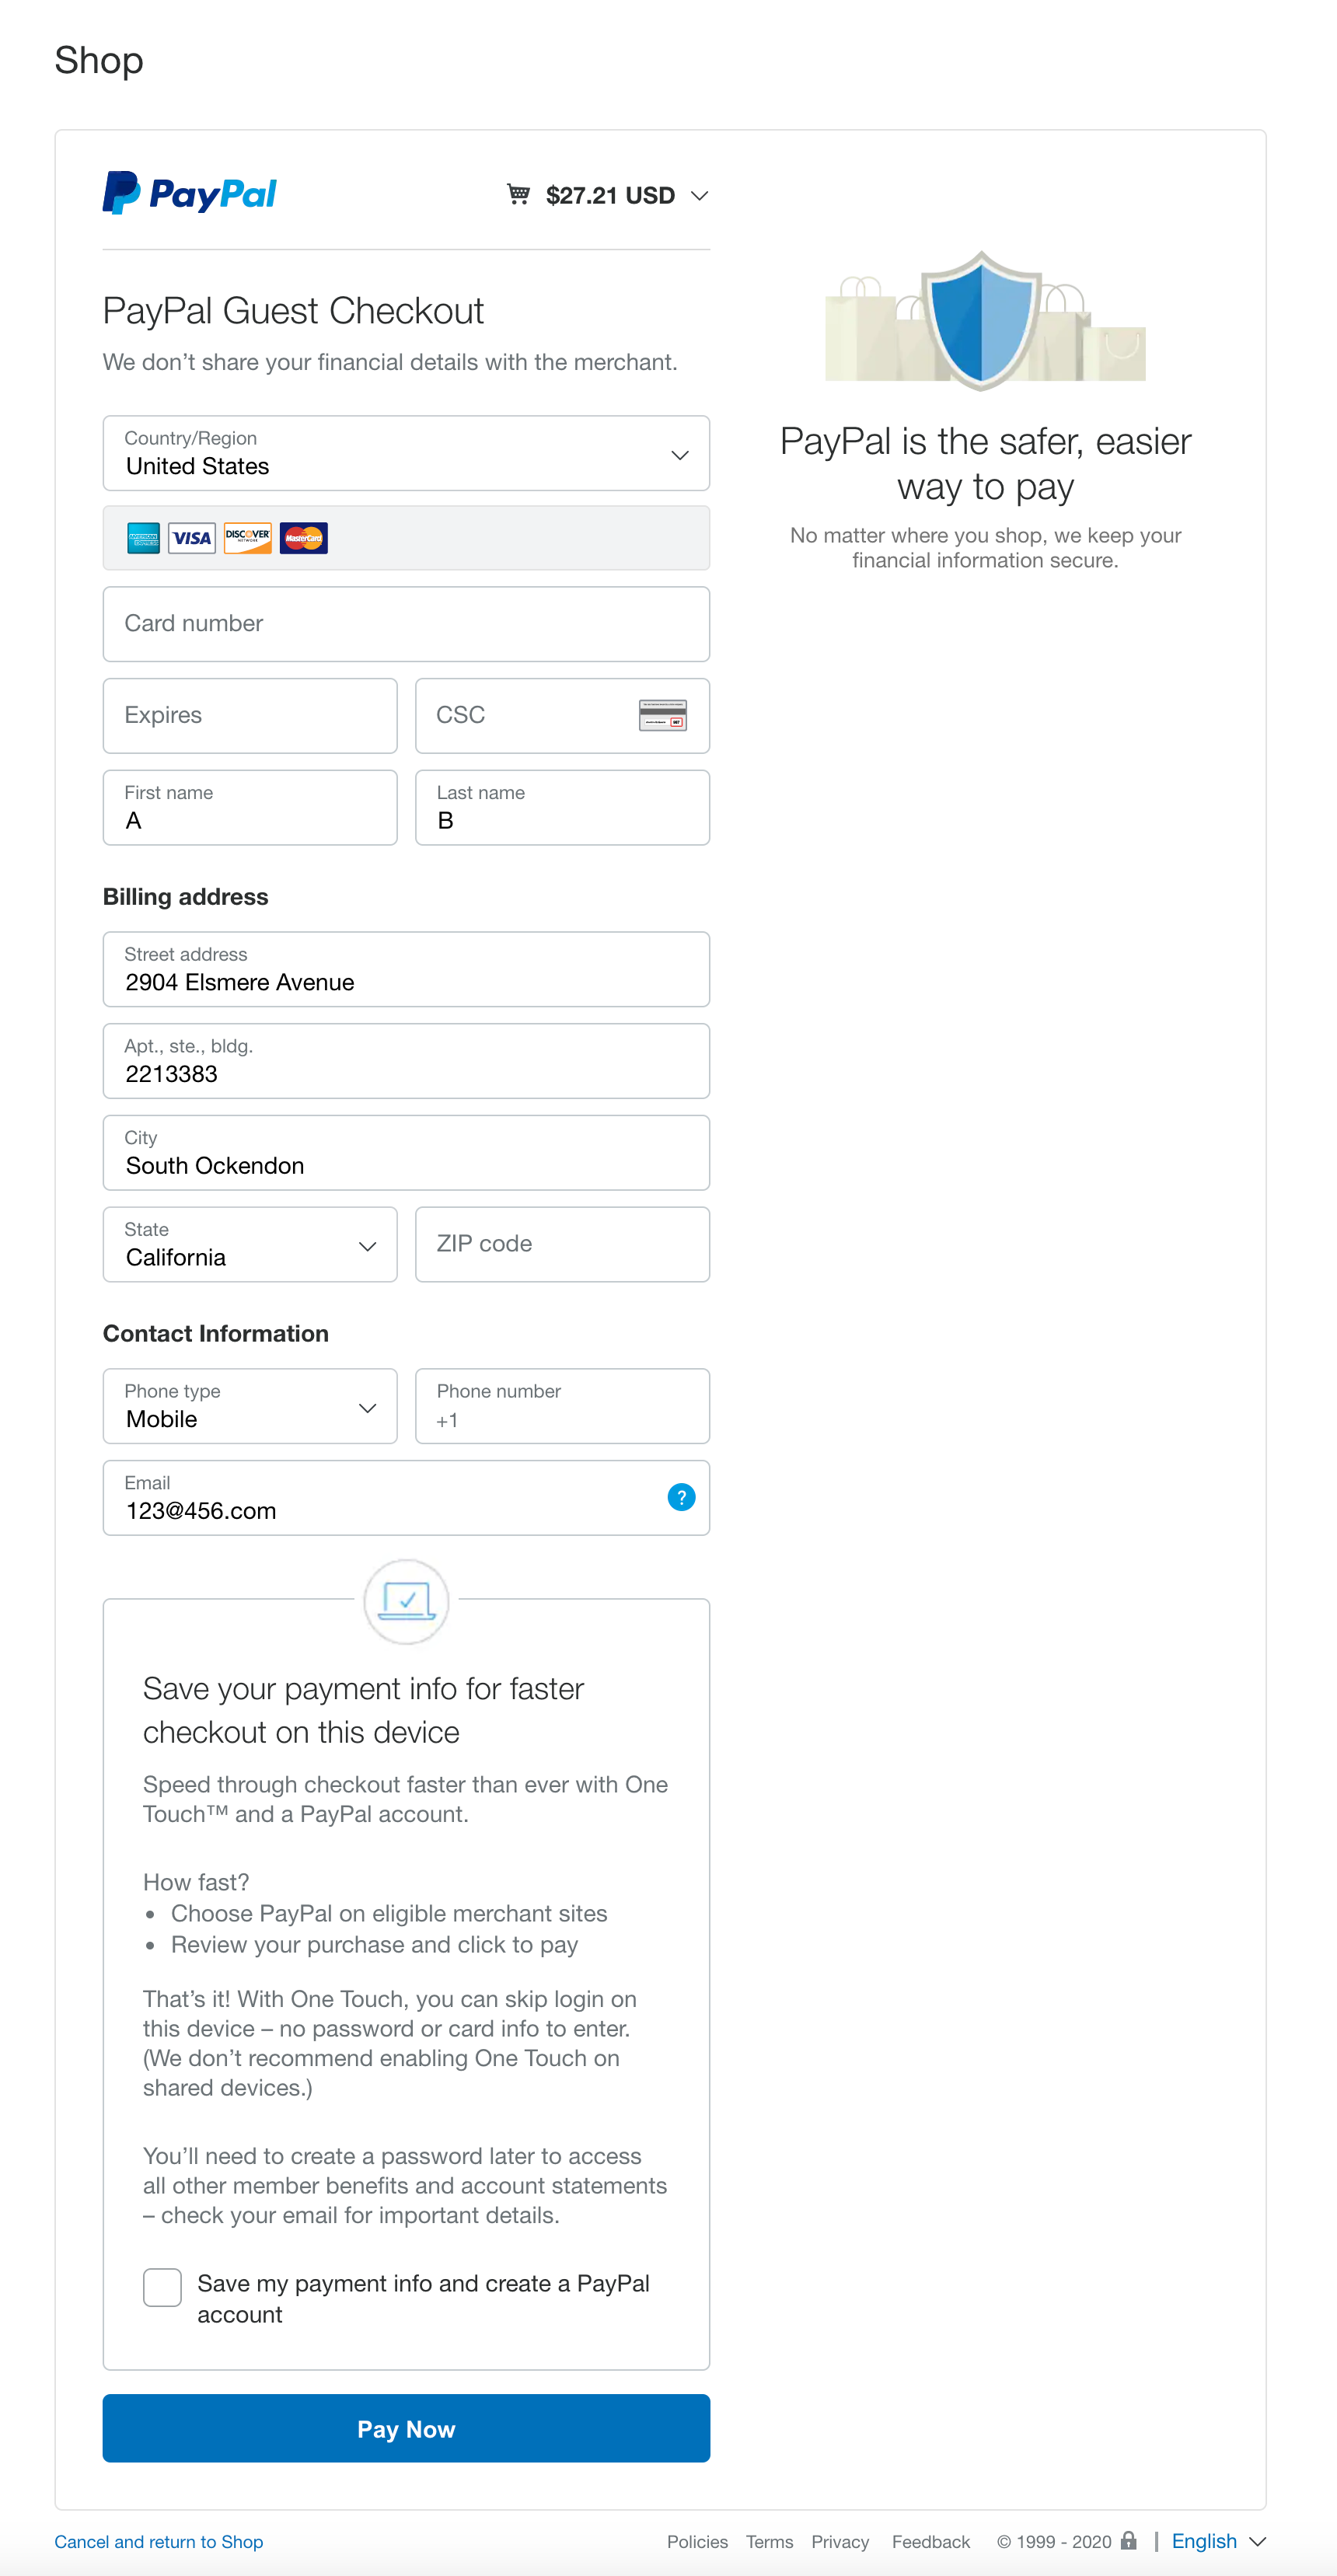
How to pay by credit card in PayPal?
When you do not have a PayPal account and want to pay with a credit card, you can follow this process:
Step 1. At the last step of checkout, select PayPal as the payment method for the complete order.

Step 2. On the PayPal payment page that pops up, find the Pay with Credit or Debit Card button and click to enter the next step.

Step 3. Then you will see the credit card payment page, after completing the requirements, see the bottom of the page, click Pay Now to complete the payment.