![- Wax Seal Stamp - [Royal Wax Seals]](http://img.staticdj.com/5f77bf6ad5deadc08da43c7ebb6e473f_600x.png)
![Fancy Letter A-Z & Wax Seal Stamp - Custom Fancy Letter Wax Stamp Kits-Wax Seal Wedding Invitations, Envelope Seal Stamp, Initial Wax Seal Stamp - Wax Seal Stamp - [Royal Wax Seals]](http://img.staticdj.com/c5e825762b75b9e71a8c2cff0d5215a0_1080x.jpeg)
![Fancy Letter A-Z & Wax Seal Stamp - Custom Fancy Letter Wax Stamp Kits-Wax Seal Wedding Invitations, Envelope Seal Stamp, Initial Wax Seal Stamp - Wax Seal Stamp - [Royal Wax Seals]](http://img.staticdj.com/03d492756d83cdb264346717ee63a097_1080x.jpeg)
![Fancy Letter A-Z & Wax Seal Stamp - Custom Fancy Letter Wax Stamp Kits-Wax Seal Wedding Invitations, Envelope Seal Stamp, Initial Wax Seal Stamp - Wax Seal Stamp - [Royal Wax Seals]](http://img.staticdj.com/294efd269e1607e04203a0ed044da916_1080x.png)
![Fancy Letter A-Z & Wax Seal Stamp - Custom Fancy Letter Wax Stamp Kits-Wax Seal Wedding Invitations, Envelope Seal Stamp, Initial Wax Seal Stamp - Wax Seal Stamp - [Royal Wax Seals]](http://img.staticdj.com/9f5691fa2c8b9795d2387c706a6054a3_1080x.jpeg)
![Fancy Letter A-Z & Wax Seal Stamp - Custom Fancy Letter Wax Stamp Kits-Wax Seal Wedding Invitations, Envelope Seal Stamp, Initial Wax Seal Stamp - Wax Seal Stamp - [Royal Wax Seals]](http://img.staticdj.com/3eed03b06f077d8af45b4249dc52075f_1080x.png)
![Fancy Letter A-Z & Wax Seal Stamp - Custom Fancy Letter Wax Stamp Kits-Wax Seal Wedding Invitations, Envelope Seal Stamp, Initial Wax Seal Stamp - Wax Seal Stamp - [Royal Wax Seals]](http://img.staticdj.com/71c0e4a58a20d95092f821130292c081_1080x.png)
![Fancy Letter A-Z & Wax Seal Stamp - Custom Fancy Letter Wax Stamp Kits-Wax Seal Wedding Invitations, Envelope Seal Stamp, Initial Wax Seal Stamp - Wax Seal Stamp - [Royal Wax Seals]](http://img.staticdj.com/c5e825762b75b9e71a8c2cff0d5215a0_100x.jpeg)
![Fancy Letter A-Z & Wax Seal Stamp - Custom Fancy Letter Wax Stamp Kits-Wax Seal Wedding Invitations, Envelope Seal Stamp, Initial Wax Seal Stamp - Wax Seal Stamp - [Royal Wax Seals]](http://img.staticdj.com/03d492756d83cdb264346717ee63a097_100x.jpeg)
![Fancy Letter A-Z & Wax Seal Stamp - Custom Fancy Letter Wax Stamp Kits-Wax Seal Wedding Invitations, Envelope Seal Stamp, Initial Wax Seal Stamp - Wax Seal Stamp - [Royal Wax Seals]](http://img.staticdj.com/294efd269e1607e04203a0ed044da916_100x.png)
![Fancy Letter A-Z & Wax Seal Stamp - Custom Fancy Letter Wax Stamp Kits-Wax Seal Wedding Invitations, Envelope Seal Stamp, Initial Wax Seal Stamp - Wax Seal Stamp - [Royal Wax Seals]](http://img.staticdj.com/9f5691fa2c8b9795d2387c706a6054a3_100x.jpeg)
![Fancy Letter A-Z & Wax Seal Stamp - Custom Fancy Letter Wax Stamp Kits-Wax Seal Wedding Invitations, Envelope Seal Stamp, Initial Wax Seal Stamp - Wax Seal Stamp - [Royal Wax Seals]](http://img.staticdj.com/3eed03b06f077d8af45b4249dc52075f_100x.png)
![Fancy Letter A-Z & Wax Seal Stamp - Custom Fancy Letter Wax Stamp Kits-Wax Seal Wedding Invitations, Envelope Seal Stamp, Initial Wax Seal Stamp - Wax Seal Stamp - [Royal Wax Seals]](http://img.staticdj.com/71c0e4a58a20d95092f821130292c081_100x.png)
❤Wax Seal Stamp Wide Application:
This wax seal kit can be used to seal many different kinds of invitation or gift package such as envelope, wedding invitations, wine package, perfume package, parcels, etc. to make a great look and sense to your gift. Also use to avoid to opening furtively for important documents and some private information.
Unique Gift:It will be an unique creative romantic gift for your lover, friends and family on Valentine's Day, Mother's day, Christmas Day, Birthday, Thanksgiving Day, etc.
our fully custom wax seal stamp are individually engraved, using the most advanced laser engraving technology, Make a clear and precise impression on the wax.
Sealing Wax is an indispensable match to show your taste!
Beautifully packed in a burlap pouch of a random color for FREE!
Products Specification
Stamp Material: Copper
Wax Material: Rosin and Artificial Venetian Resin
Wax Color: Gold Wax
Seal Size: As shown, generally 25mm (1 inch) or 30mm(1.2 inches)
Seal Length: 90mm (3.5 inches)
Standard Weight: 55g~65g
Package Plans:
Seals Only: Stamp + Wooden handle + Flannel bag (No Wax Inside)
Standard Kit: Stamp + Wooden handle + Gift box + 1 Sealing Wax
Advanced Kit: Stamp + Wooden handle + Gift box + 2 Sealing Wax
❤How It Works:
Step.1 Select the handle and toolset you want
Step.2 Select the size of Seal
Step.3 use the upload function to upload your work
❤How To Use It:
1) Melt the wax with a spoon on the candle
2) Drip the wax on the surface (paper, glass, ceramics, etc)
3) Place the stamp on the wax and wait for a few seconds
4) Lift the stamp up slowly and it's done
❤ Why buy wax seal stamp kit from me ?
1)Have more advanced carving technology. No matter how complicated your logo is, I can engrave every detail of the stamp for you.
2)Better after-sales service. Free custom, free replacement , If you are not satisfied with the quality of stamp, I will give you a full refund.
3)More environmentally friendly. Wax beads is made of natural rubber, which can be reused and has bright colors, very suitable for wedding invitations and birthday gifts.
More Custom Wax Seal Stamp Here👉: >>CUSTOM
More Hot Styles Wax Seal Stamp Here👉: Best Selling
More Advanced Wax Seals Accessories Here👉: >> ACCESSORIES
More Colors of Sealing Wax Here👉: >>WAX
More Advanced Wax Seals Handle Here👉: >> HANDLE
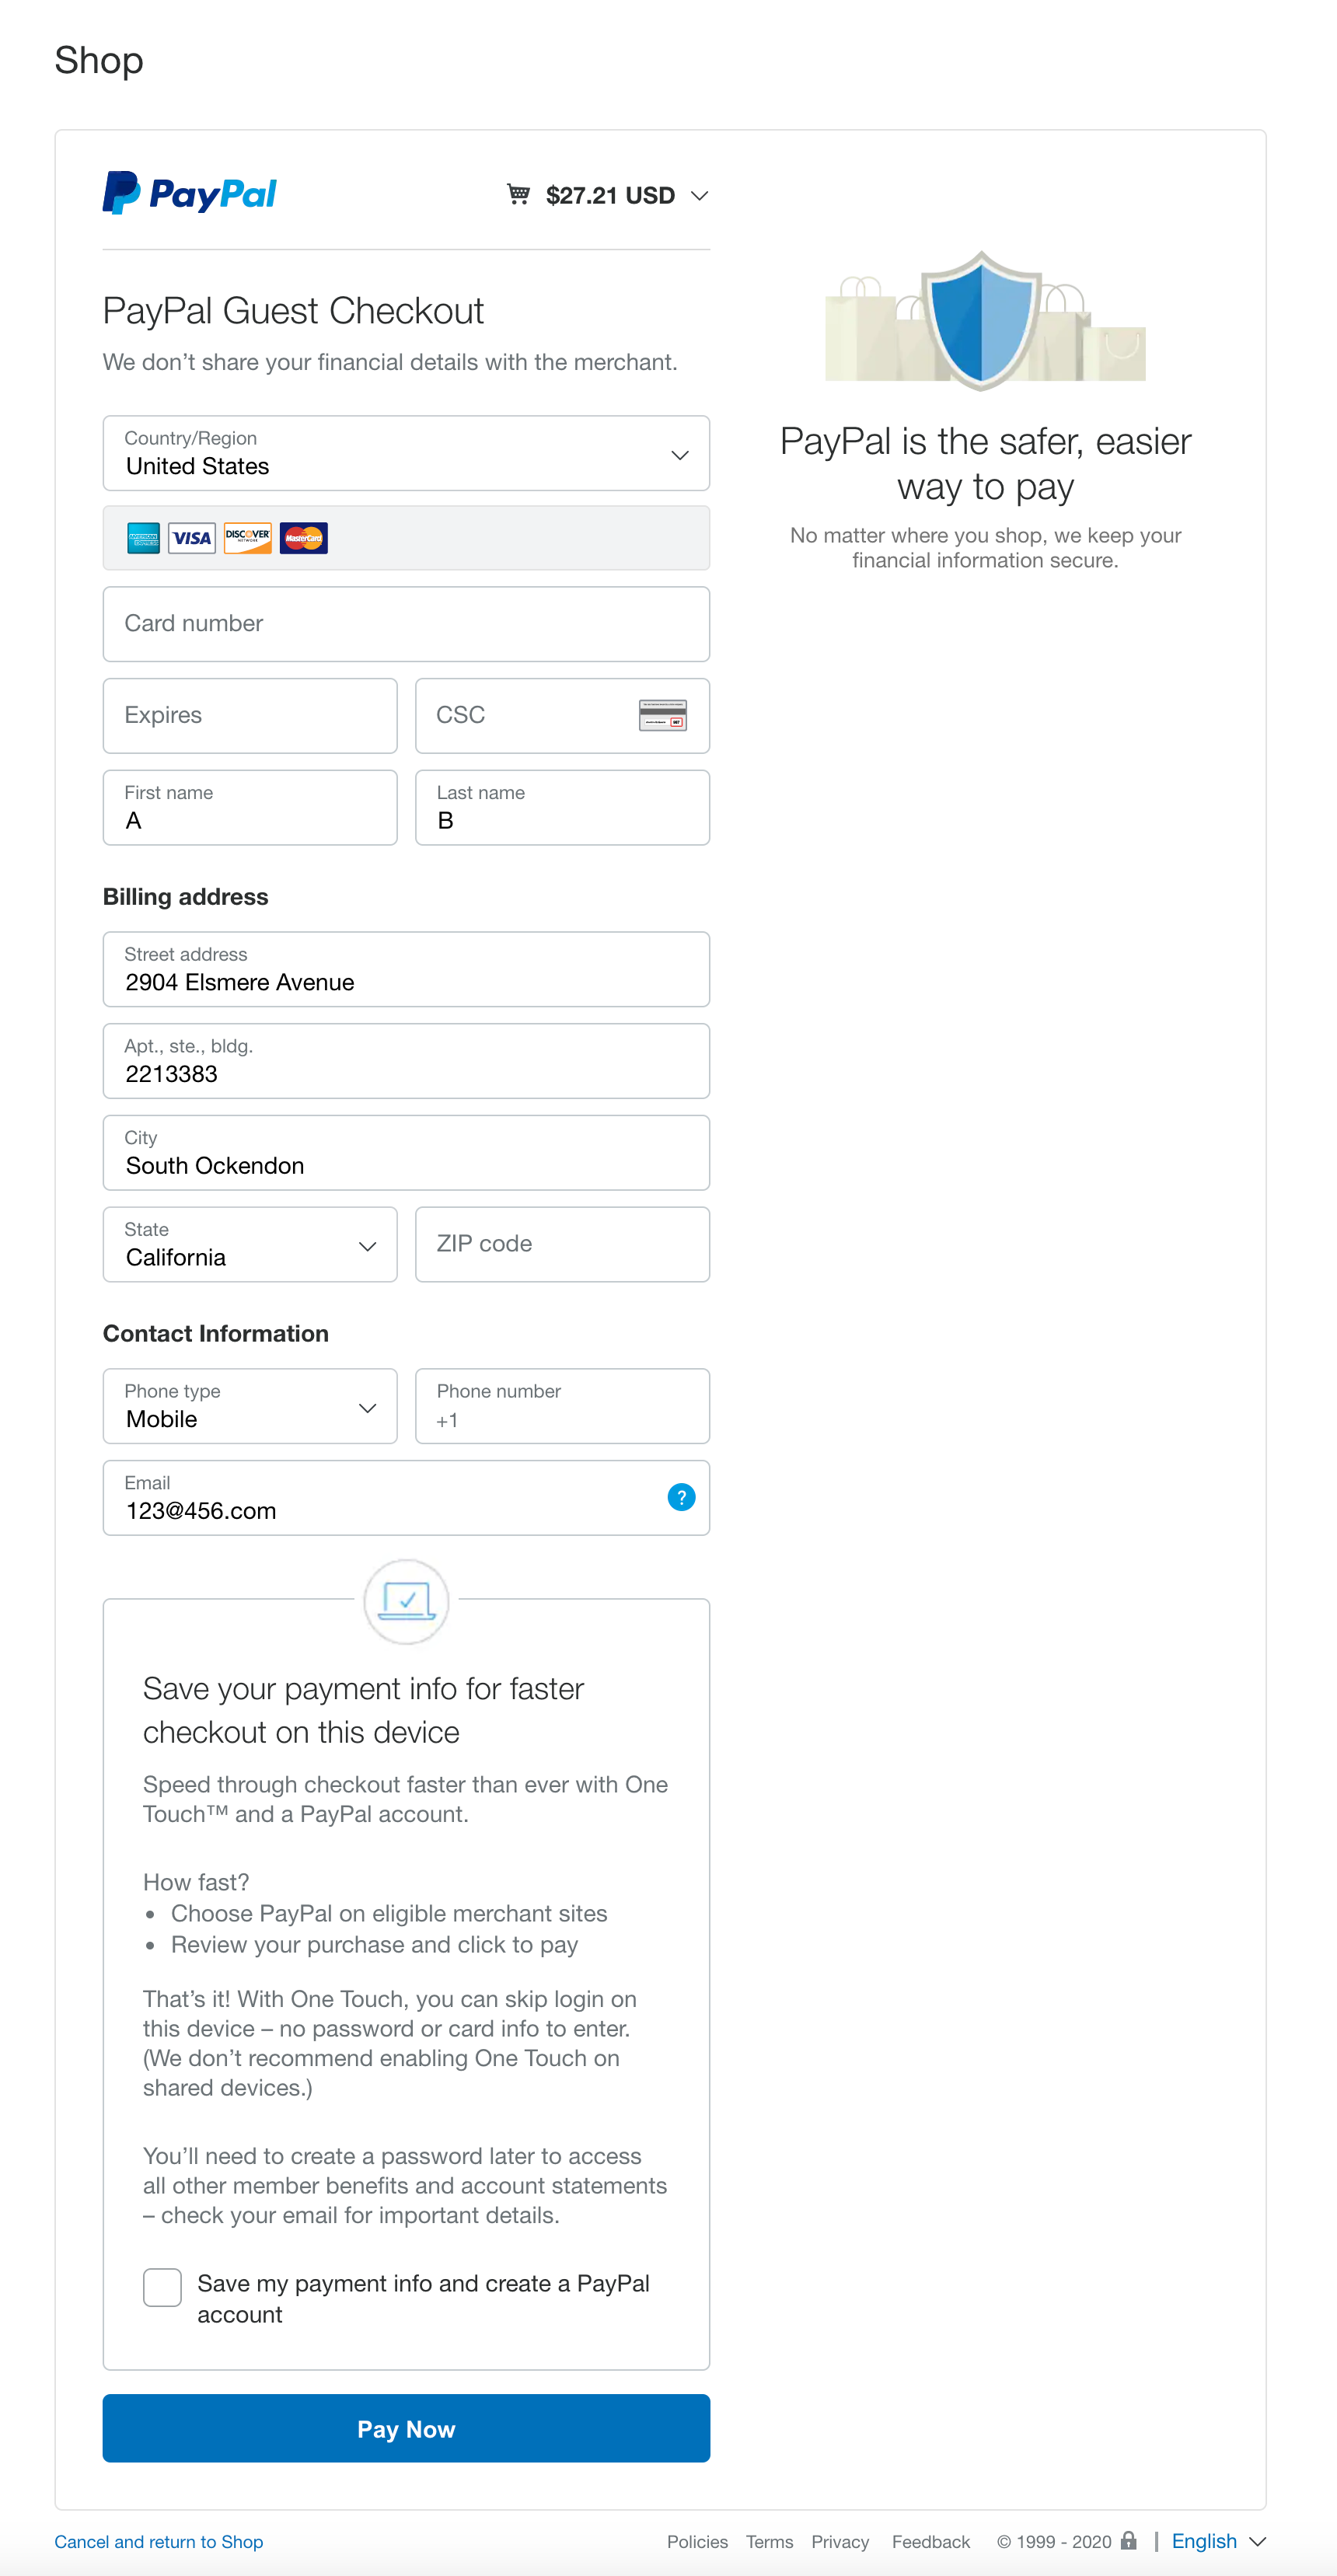
How to pay by credit card in PayPal?
When you do not have a PayPal account and want to pay with a credit card, you can follow this process:
Step 1. At the last step of checkout, select PayPal as the payment method for the complete order.

Step 2. On the PayPal payment page that pops up, find the Pay with Credit or Debit Card button and click to enter the next step.

Step 3. Then you will see the credit card payment page, after completing the requirements, see the bottom of the page, click Pay Now to complete the payment.